On a PV diagram the work done by the gas is the area under the path, so the same two volumes joined differently give different answers — and a leg held at one pressure is the easiest of them, a plain rectangle of height P and width V2 - V1. This free PV diagram calculator solves W = P (V2 - V1) for the work, the pressure or either volume, and prints the areas the same volume change would have enclosed along an isotherm, along an adiabat and along an isochore beside the answer. That is four legs on one pair of axes, costed, with no amount of gas and no temperature anywhere in it.
Load a real PV diagram leg
Every button writes all five boxes in their default units, so whichever quantity the Solve for menu is pointing at, the remaining four already agree with it exactly. The line underneath quotes back whatever the widget works out from that, so nothing in it is stored text.
Pick a leg above, or type your own numbers.
What Is the PV Diagram Calculator?
The PV diagram calculator is a free online tool for the one fact that makes a pressure-volume plot worth drawing: the work done by the gas is the area under the path it took. For a leg held at a single pressure that area is a rectangle, so the integral of P dV collapses to W = P(V2 - V1), and this page rearranges it for any one of its four quantities. Give it three of the work, the pressure, the starting volume and the final volume and it returns the fourth, in whichever of the four unit menus that box was set to.
Beside the answer sit the areas the same volume change would have enclosed along the other three legs. An isotherm encloses P1V1 ln(V2/V1); an adiabat encloses (P1V1 - P2V2)/(gamma - 1); an isochore has no width at all and so encloses nothing. Those three figures and a fourth chip, the isothermal area as a percentage of the rectangle, are worked out from the complete state with the solved value substituted back, which is what makes them the same four numbers whichever quantity you asked the page for.
The heat capacity ratio is an input in every mode and is never one of the unknowns, because it belongs to the gas rather than to the leg. It drives the adiabatic figure alone: change it and the headline, the isotherm and the area fraction all stay exactly where they were, which is a result worth seeing rather than a limitation. A ratio of 1 or below is refused, because that ratio minus one is the denominator of the adiabatic area.
Two inputs are declined rather than answered, and both refusals are deliberate. Equal volumes in the pressure mode leave the pressure undetermined rather than infinite, since a leg of no width does a stated work only if that work is zero and then every pressure satisfies it. A work larger than the pressure times the far volume is refused for the same kind of reason: it would put the other end of the leg at a negative volume.
What the page does not do, it says. It costs one leg at a time, so a closed cycle is the sum of its legs with their signs kept rather than a single run. It computes no efficiency, no coefficient of performance, no entropy, no heat, no internal energy and no slope - a pressure-volume diagram fixes the net work of a loop but not the heat taken into it, so an efficiency is simply not determined by one.
| Symbol | Quantity | Default unit | Also accepts | Example value |
|---|---|---|---|---|
| W | Work done by the gas | J | kJ, cal, kWh | 600 |
| P | Pressure of the leg | kPa | Pa, bar, atm, MPa | 100 |
| V1 | Starting volume | L | m3, mL, cm3 | 2 |
| V2 | Final volume | L | m3, mL, cm3 | 8 |
| gamma | Heat capacity ratio | dimensionless | no unit menu | 1.4 |
How to use the PV diagram calculator
- Choose the unknown. The Solve for menu opens on Work done by the gas, and the other three choices are Pressure of the leg, Starting volume and Final volume. Whichever you pick vanishes from the boxes below and the rest become your inputs.
- Type the pressure of the leg. It takes Pa, kPa, bar, atm or MPa and opens on 100 kPa. This is the height of the rectangle, held the whole way across, and it must be above zero in the three modes that read it.
- Type the two volumes. Both take L, m3, mL or cm3, and a millilitre and a cubic centimetre are the same unit. They open on 2 L and 8 L, so the rectangle is 6 L wide; put the final volume below the starting one and every work figure on the page changes sign.
- Type the heat capacity ratio. The gamma box is an input in every mode and is never one of the four unknowns, so it stays on screen whichever quantity the menu is pointing at. It drives the adiabatic chip and nothing else, which is why the headline does not move when you change it.
- Read the answer. The headline always carries four significant figures: a plain decimal with trailing zeros dropped while the figure is at least 0.0001 and below 10 million, and the same four figures in exponential notation outside that range. It appears in the unit that box was showing, so set the unit while the quantity is still an input and then point Solve for back at it.
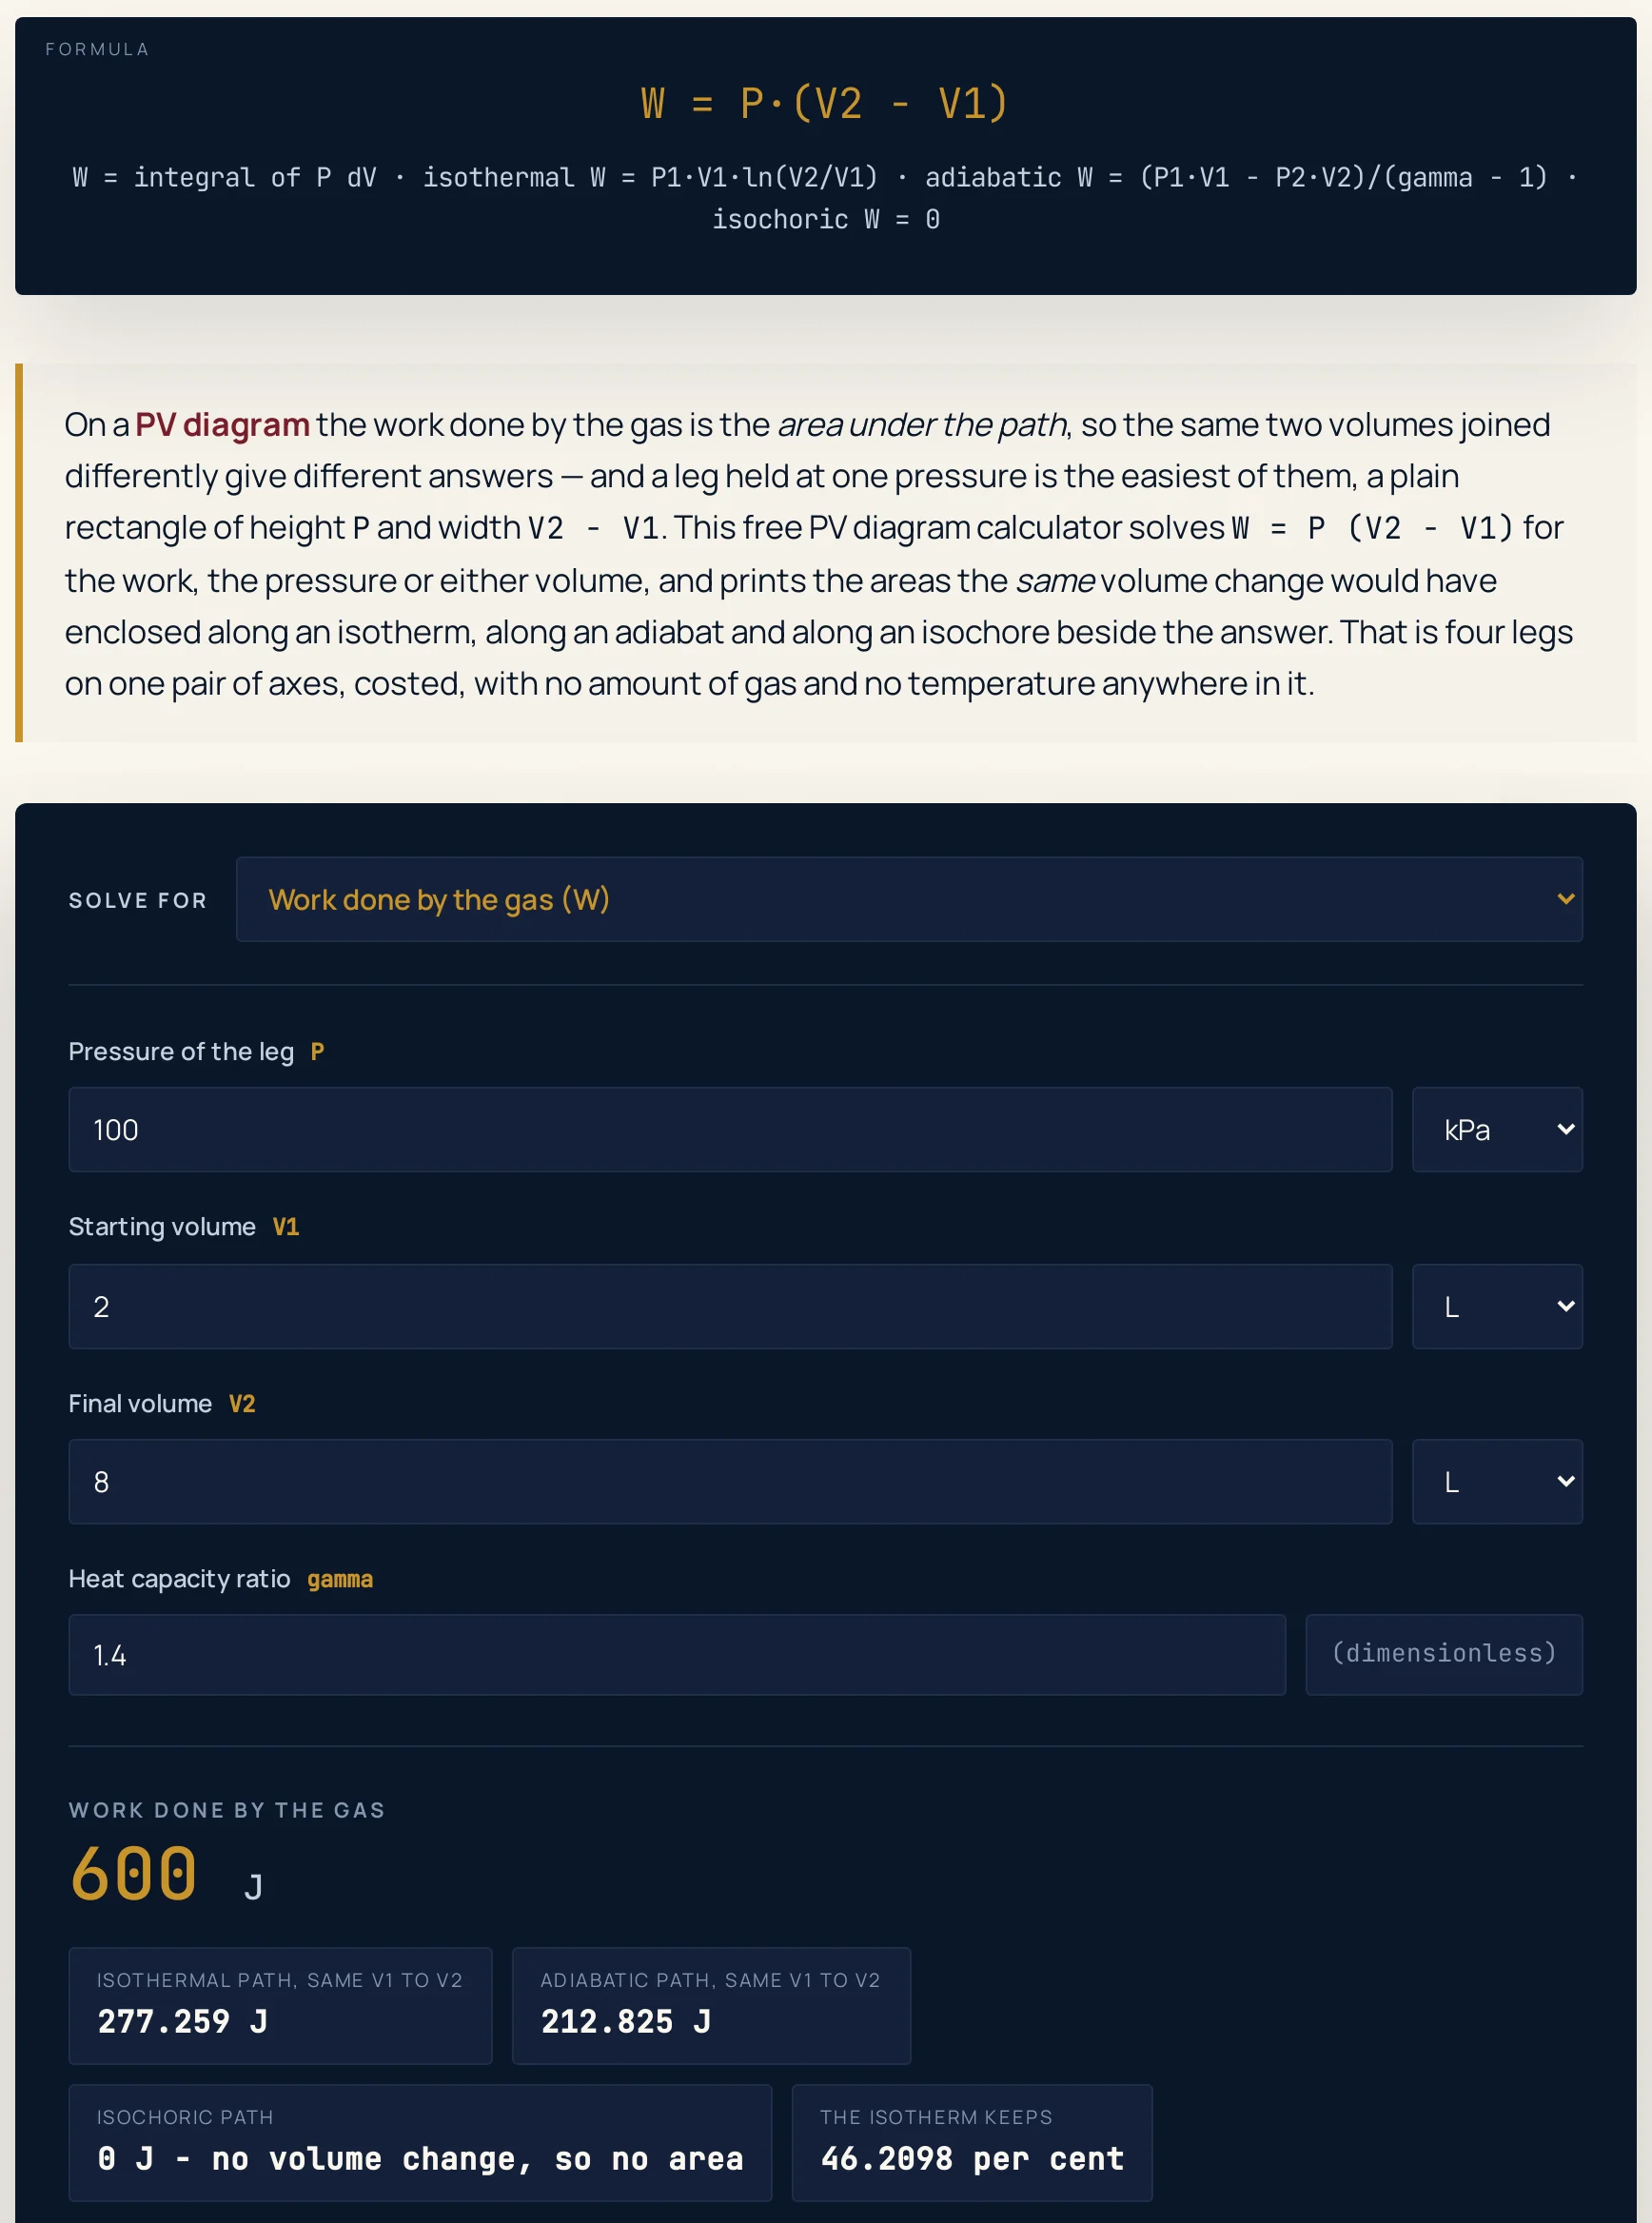
- Read the first two chips, which are the point of the page. They are the areas the same volume change would have enclosed along an isotherm and along an adiabat. At the defaults they read 277.259 J and 212.825 J against a rectangle of 600.000 J, so the choice of path is worth more than a factor of two.
- Read the isochoric chip as a statement, not a sum. It is a fixed string, because a vertical segment has no width and therefore no area: it is the fourth leg, joining the three other end points, and it does exactly zero work wherever you put it.
- Read the area-fraction chip. It is the isothermal area as a percentage of the rectangle, and it depends on the volume ratio alone — not on the pressure and not on the gas. It prints a hyphen when the two volumes are equal, because a rectangle of no area is not something anything can be a fraction of.
- Open Show working. The steps restate the area rule, list your figures in SI units, rearrange the relation for the quantity you asked for, and then give the isotherm, the adiabat, the isochore and both area fractions in full, with your figures converted into every unit the boxes offer.
This page exists for one sentence that our own guides state without ever costing: that the work is the area, so the path matters. The PV diagrams and thermodynamic cycles guide is the prose half of that argument, with the four legs drawn, the cycle closed and the worked problems. The convention the sign here follows, that the work is the work done by the gas, is the one set out in the first law of thermodynamics guide, which is where an area becomes an energy balance.
Three mistakes account for most wrong answers here. The first is using this rectangle for a journey along which the pressure did not stay put, which is what the first two chips are printed to warn you about; the second is typing a volume ratio of 4 into a Final volume box that wants a volume. The third is reaching for the isothermal process calculator for a constant-pressure leg, or this page for a constant-temperature one — the two differ by more than half the answer at the defaults.
Worked example: change one thing at a time
The table starts at the defaults, moves the unknown through all four quantities, then changes only the gas, only the pressure, only the direction and only the size of the step, walks every unit menu, and finally reaches the entries the calculator declines. Rows 1 to 4 are one leg solved four ways. Every Headline answer and both chip cells were read out of the running widget rather than worked out by hand, so where a cell and the tool ever part company, believe the tool.
| Step | Solving for | What you type | Headline answer | Isothermal area | Adiabatic area |
|---|---|---|---|---|---|
| The page as it opens | Work | 100 kPa from 2 L to 8 L, gamma 1.4 | 600 J | 277.259 J | 212.825 J |
| The same leg, solved for its pressure | Pressure | 600 J across the same 2 L to 8 L | 100 kPa | 277.259 J | 212.825 J |
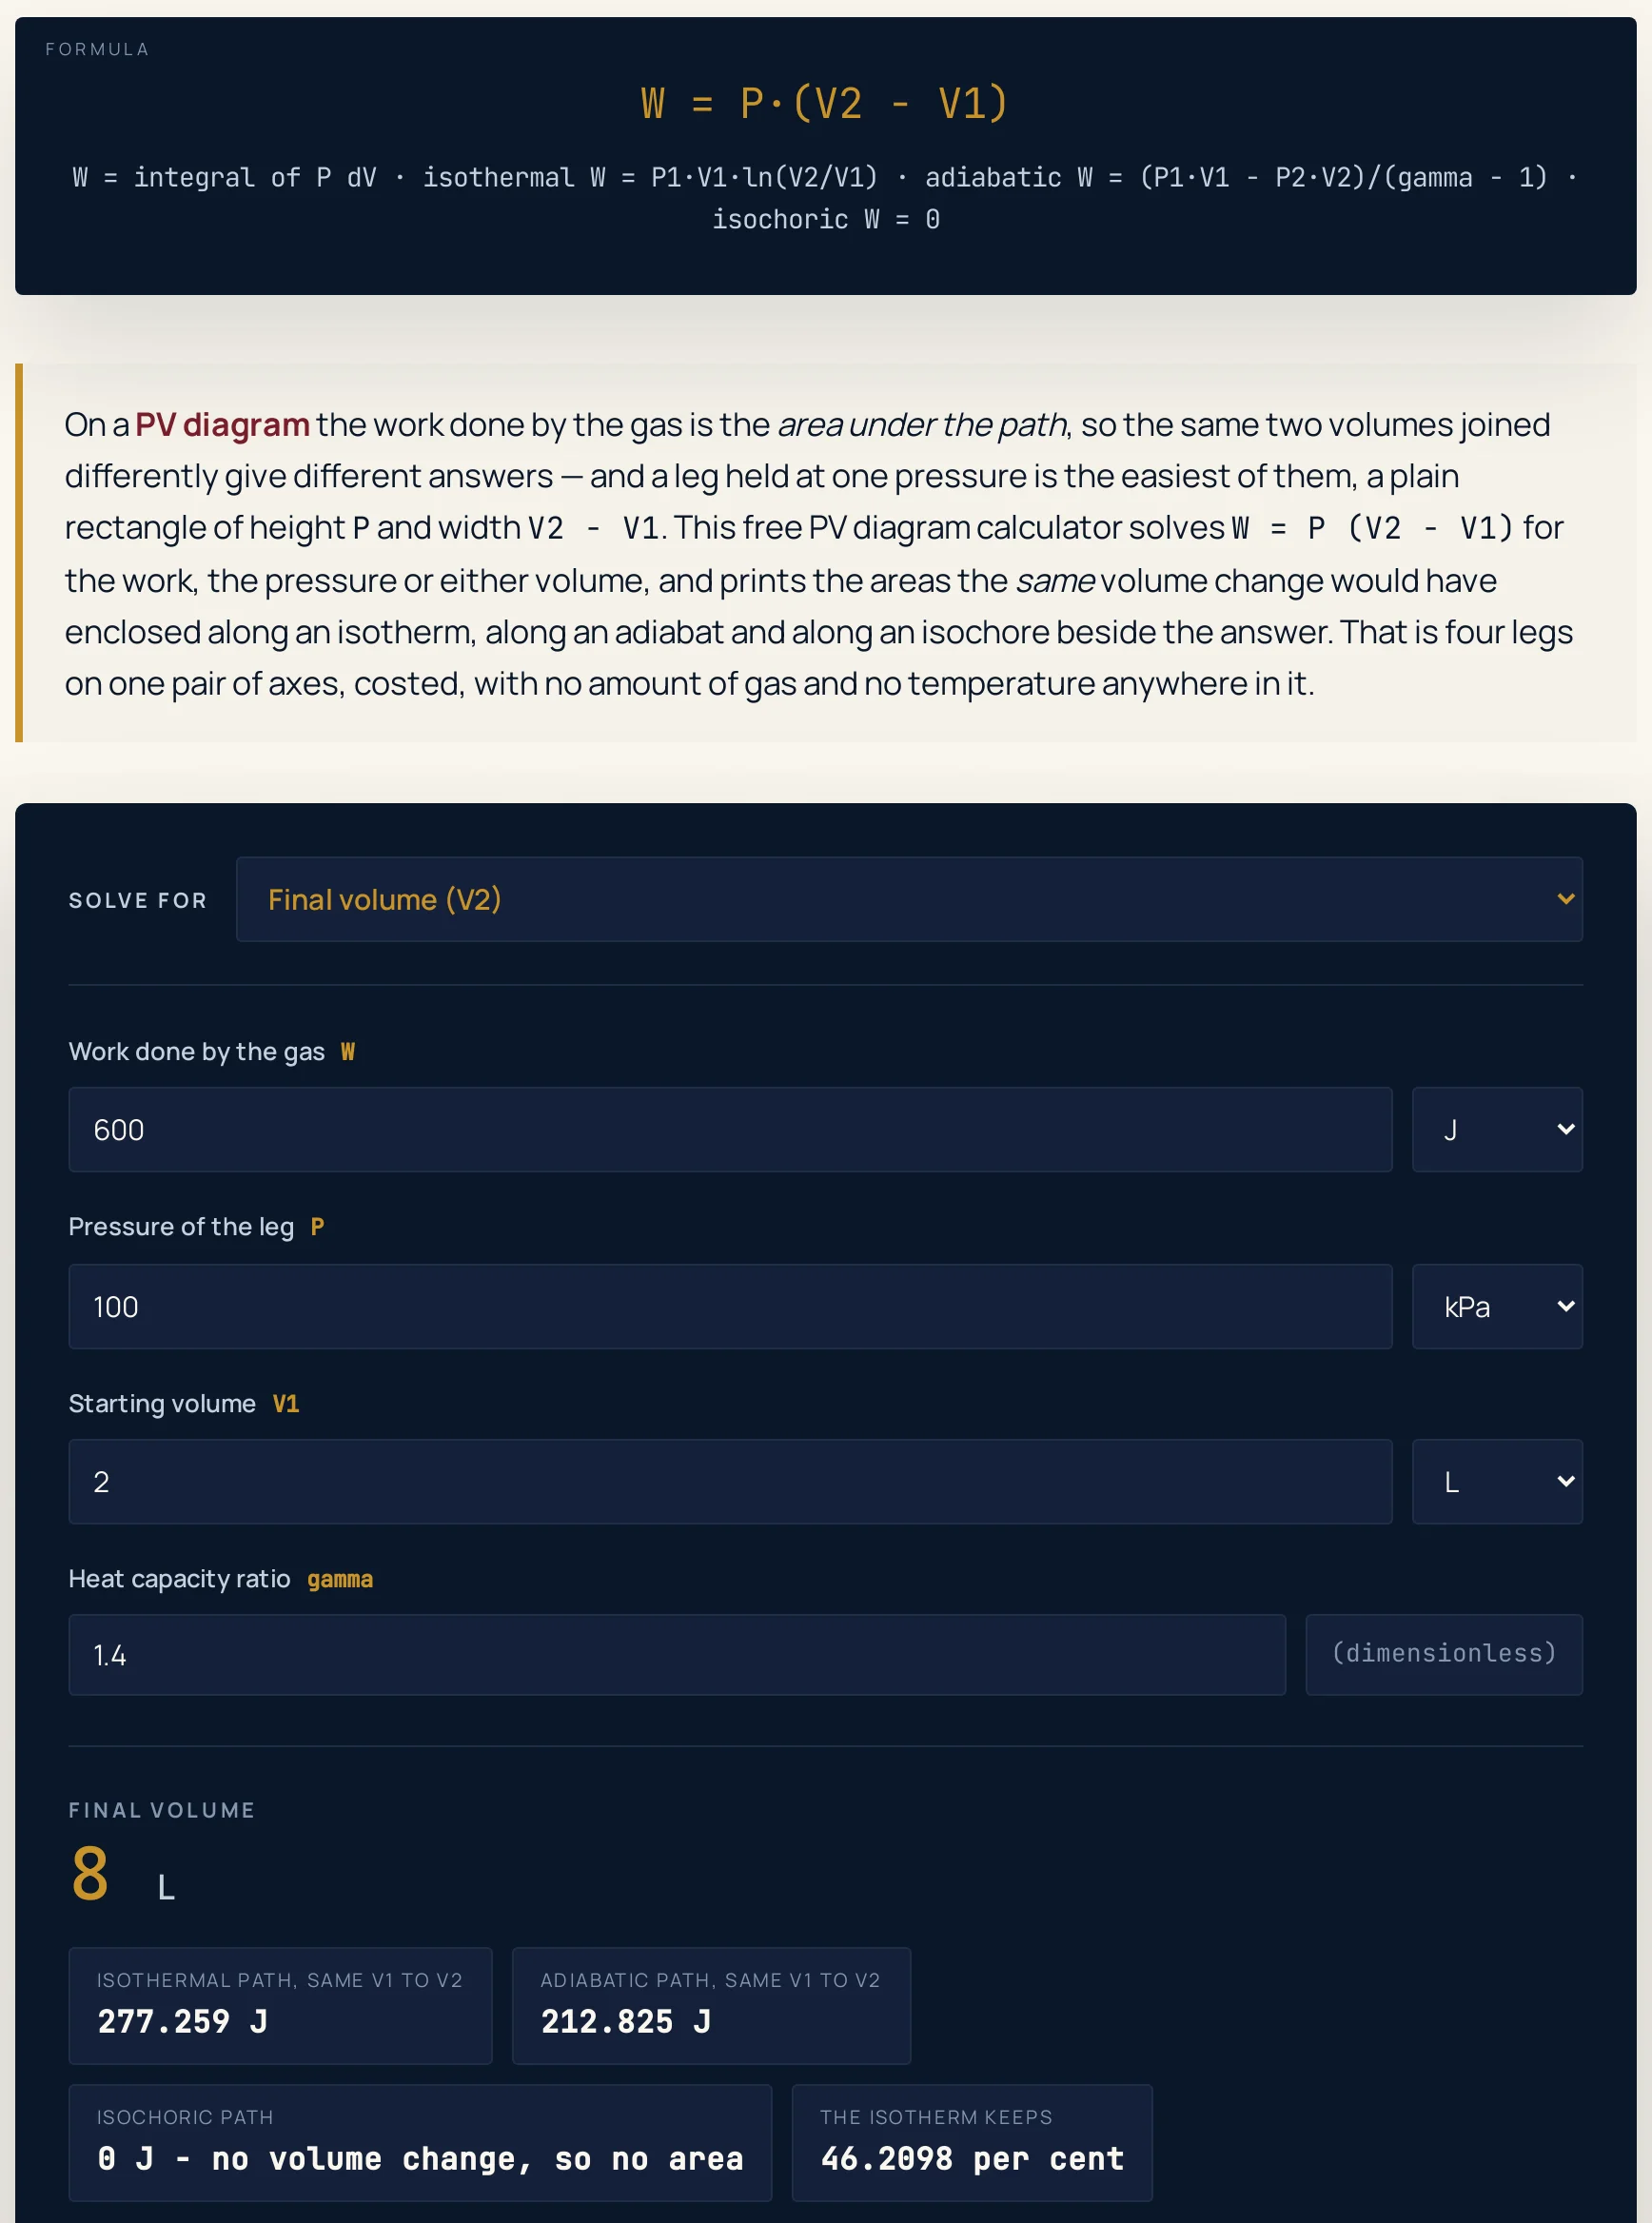
| The same leg, solved for its final volume | Final volume | 600 J at 100 kPa from 2 L | 8 L | 277.259 J | 212.825 J |
| The same leg, solved for its starting volume | Starting volume | 600 J at 100 kPa ending at 8 L | 2 L | 277.259 J | 212.825 J |
| Change only the gas, to monatomic | Work | gamma 1.66666667 instead of 1.4 | 600 J | 277.259 J | 180.945 J |
| Change only the gas, to polyatomic | Work | gamma 1.33333333 instead of 1.4 | 600 J | 277.259 J | 222.024 J |
| Raise only the pressure, to 300 kPa | Work | 300 kPa instead of 100 kPa | 1800 J | 831.777 J | 638.476 J |
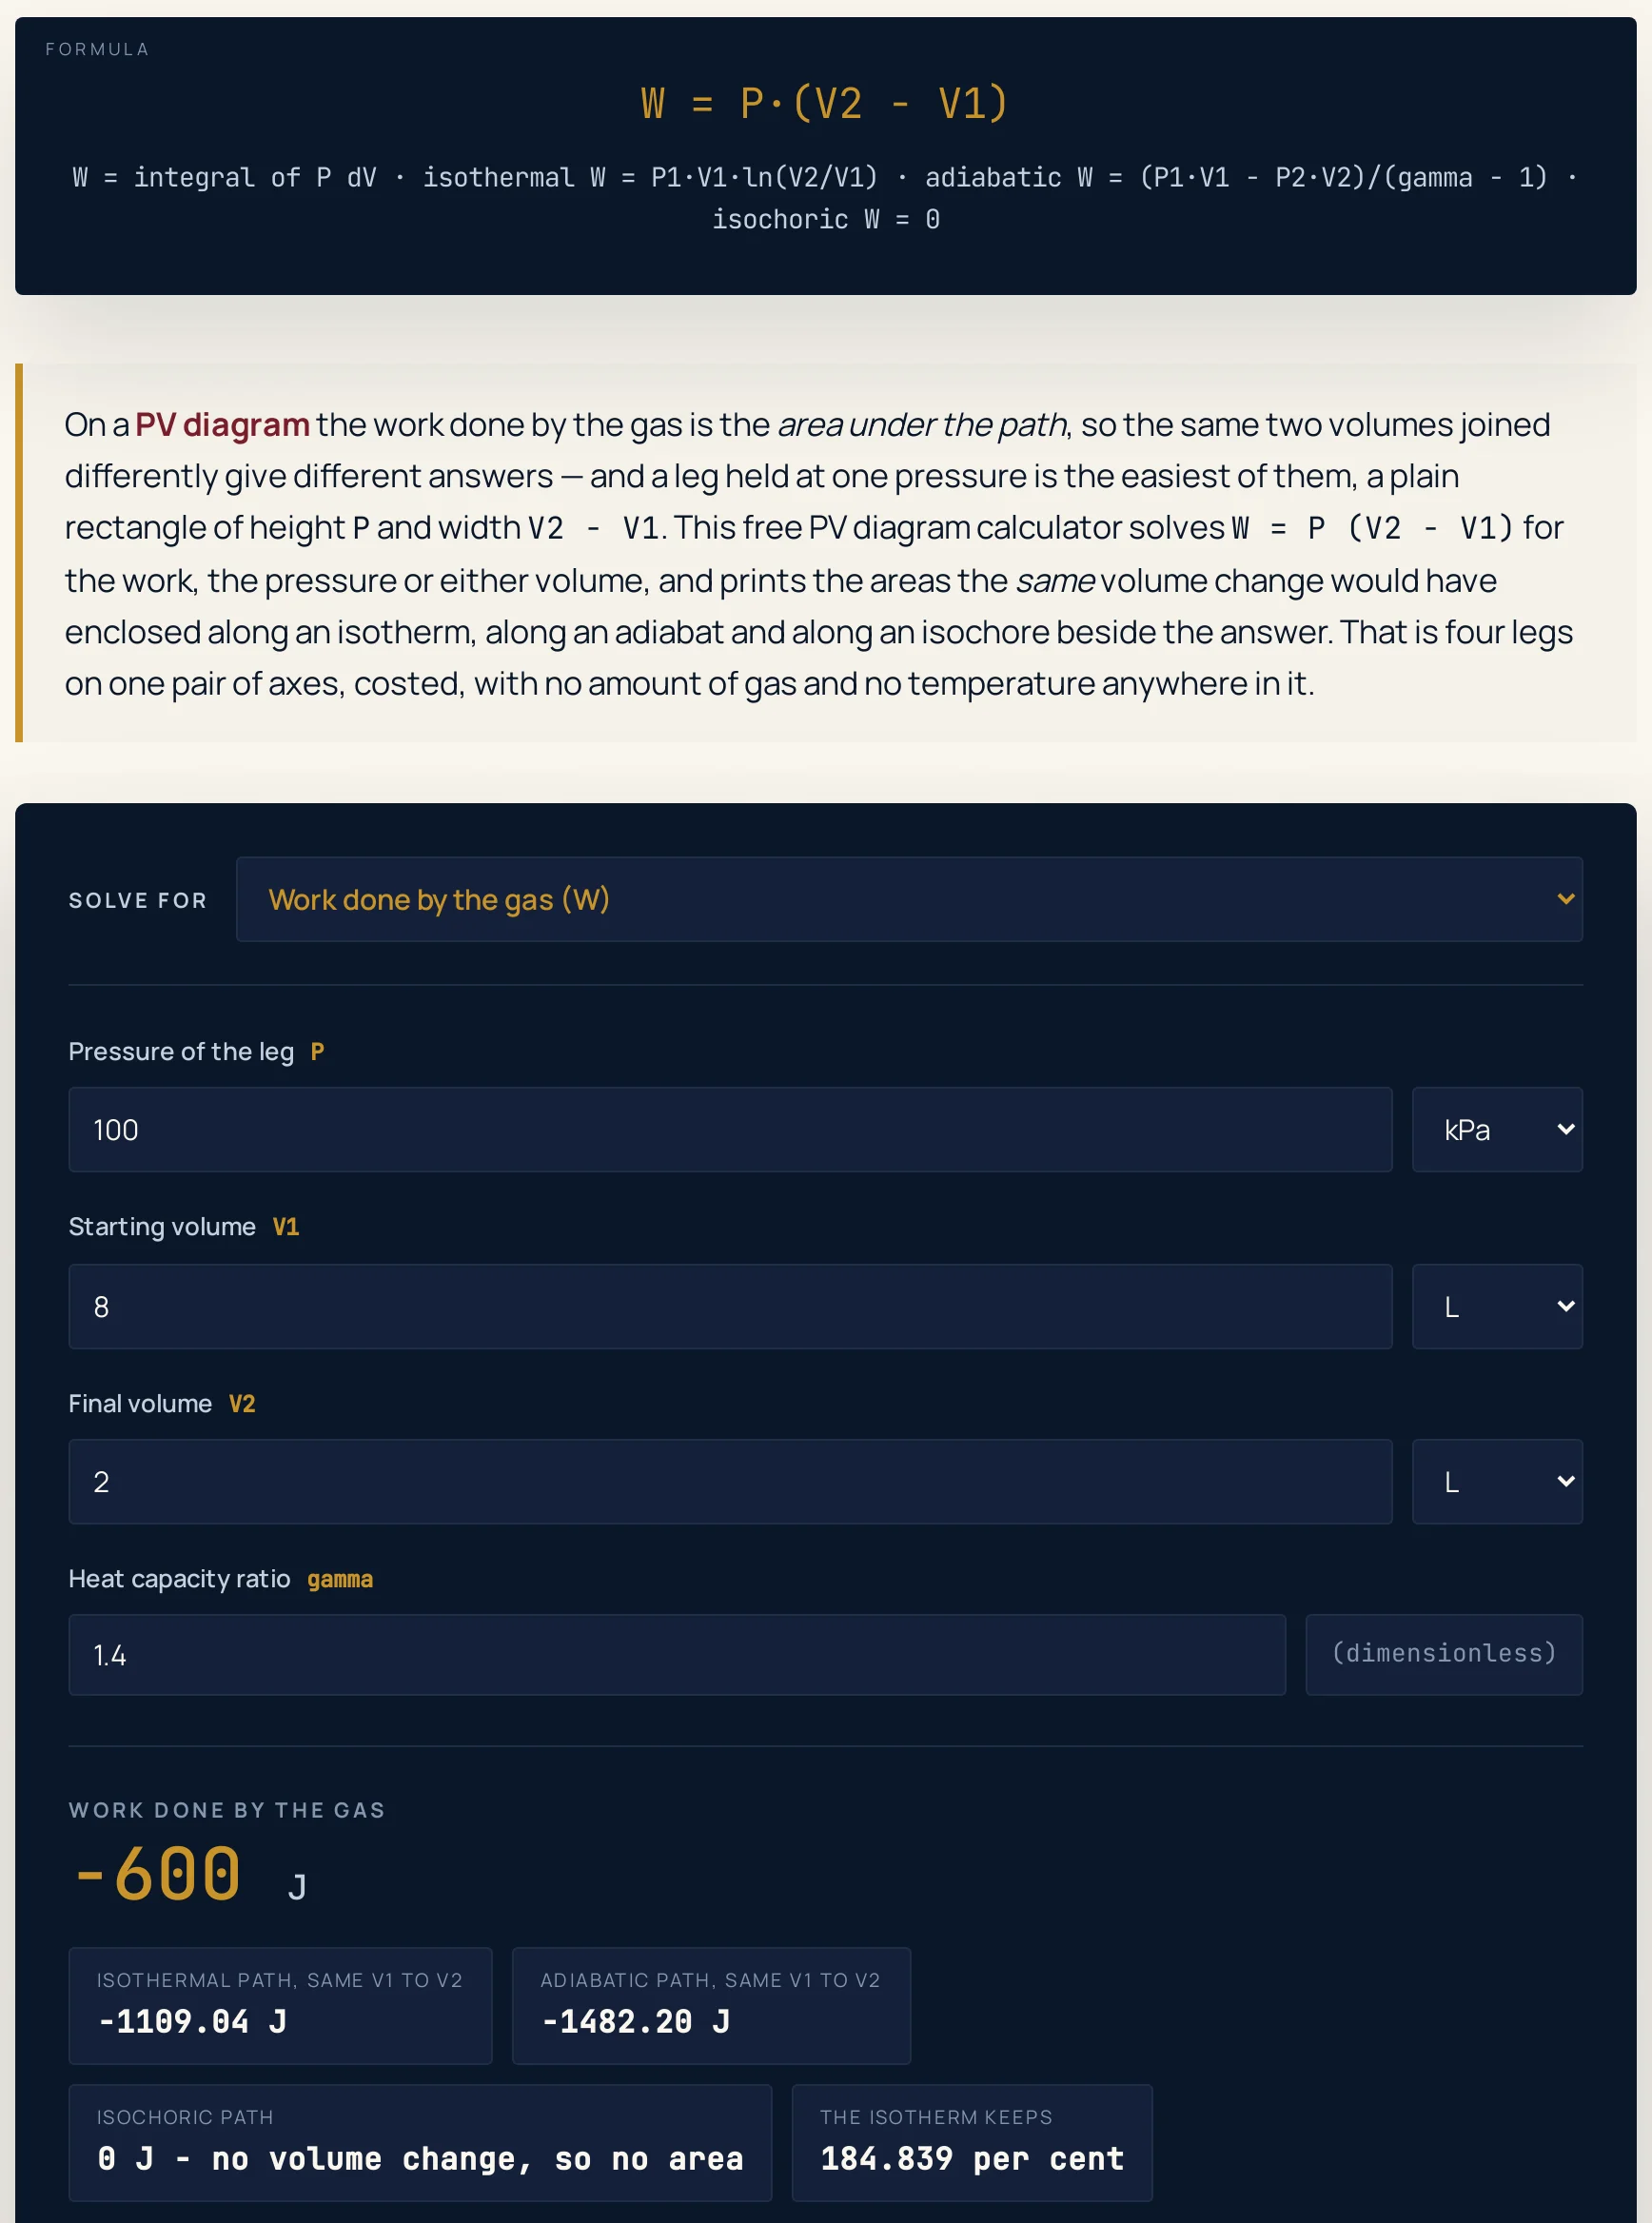
| Run the same leg backwards | Work | 8 L to 2 L instead of 2 L to 8 L | -600 J | -1109.04 J | -1482.20 J |
| No volume change at all | Work | 2 L to 2 L | 0 J | 0 J | 0 J |
| A short step, where every path is nearly flat | Work | 2 L to 2.2 L | 20 J | 19.0620 J | 18.7032 J |
| The extremes of all four boxes at once | Work | 400 kPa, 1 L to 10 L, gamma 1.1 | 3600 J | 921.034 J | 822.687 J |
| The same answer read in kilojoules | Work | the Work box set to kJ | 0.6 kJ | 277.259 J | 212.825 J |
| The same answer read in calories | Work | the Work box set to cal | 143.4 cal | 277.259 J | 212.825 J |
| The volumes typed in cubic metres | Work | 0.002 m3 and 0.008 m3 | 600 J | 277.259 J | 212.825 J |
| The volumes typed in millilitres | Work | 2000 mL and 8000 mL | 600 J | 277.259 J | 212.825 J |
| The volumes typed in cubic centimetres | Work | the same figures with the boxes set to cm3 | 600 J | 277.259 J | 212.825 J |
| The pressure typed in atmospheres | Work | 0.986923267 atm instead of 100 kPa | 600 J | 277.259 J | 212.825 J |
| A heat capacity ratio of 1 is declined | Work | gamma 1 | no answer | - | - |
| A heat capacity ratio below 1 is declined | Work | gamma 0.9 | no answer | - | - |
| Equal volumes are declined when solving for the pressure | Pressure | 2 L to 2 L | no answer | - | - |
| A zero pressure is declined | Work | 0 kPa | no answer | - | - |
| A negative starting volume is declined | Work | -2 L | no answer | - | - |
| A work too large for the pressure is declined | Starting volume | 1000 J at 100 kPa ending at 8 L | no answer | - | - |
Rows 1 to 4 are the same leg with the Solve for menu in each of its four positions, and both chip columns are identical down the four because the chips describe the state rather than the mode. That is not free: the chips are worked out from the answer substituted back into the state, so that the mode in which the final volume is the unknown still has a final volume to compare paths across.
Rows 5 and 6 change only the gas. The rectangle stays at 600 J and the isotherm stays at 277.259 J, because neither of those two paths knows what the molecule is, while the adiabatic column moves from 180.945 J for a monatomic gas to 222.024 J for a polyatomic one. A gas with more ways to store energy loses pressure more slowly and so keeps more of the area.
Rows 7 to 11 are the four comparisons worth knowing. Tripling the pressure triples all three areas exactly, because every one of them is proportional to the starting pressure; running the leg backwards makes all three negative; equal volumes make all three exactly zero; and a step of only 2 L to 2.2 L leaves 20 J, 19.0620 J and 18.7032 J, which is the statement that over a short enough interval every curve is flat.
Rows 12 to 17 change nothing but the units. One answer reads 600 J, 0.6 kJ and 143.4 cal, and the volumes typed in cubic metres, millilitres or cubic centimetres all return 600 J, because a millilitre and a cubic centimetre are the same unit. Row 17 types the pressure as 0.986923267 atm and gets the same 600 J, which is the round trip through the one multiplier people most often invert.
Rows 18 to 23 sit outside the domain and are declined there rather than answered. A heat capacity ratio of 1 or below would divide by zero in the adiabatic area, equal volumes leave the pressure undetermined rather than infinite, a zero or negative pressure or volume has no state behind it, and a work larger than the pressure times the final volume would put the start of the leg at a negative volume. In each case the widget says so in words instead of printing a number.
Formula and symbol reference
One idea does all the work here, and it is geometric rather than algebraic. A gas at pressure P pushing a piston out through a slice of volume dV does P dV of work, so adding the slices from one volume to the other gives the integral of P dV — which is exactly the area under the path on a pressure-volume plot. Hold the pressure still and every slice has the same height, so the sum collapses to W = P (V2 - V1): a rectangle.
The other three legs are the same area measured under three other curves. An isochore has no width, so its area is zero. An adiabat obeys P V^gamma = constant, which integrates to (P1 V1 - P2 V2)/(gamma - 1) with P2 = P1 (V1/V2)^gamma.
An isotherm obeys P V = constant, which integrates to P1 V1 ln(V2/V1). That is the same quantity as n R T ln(V2/V1) only because n R T = P1 V1 along an isotherm, a step that belongs to the isothermal process guide and is credited here rather than repeated.
Notice what is not in any of those four expressions. There is no amount of gas, no temperature and no gas constant, because a pressure-volume diagram carries no temperature axis and does not need one to have an area. If you want the amount or the temperature behind an end point, the gas laws guide is where the pressure, volume and temperature relations are set out, and the ideal gas law calculator will convert a state into one.
| Symbol | Meaning | SI unit | Values used on this page |
|---|---|---|---|
| W | Work done by the gas along the leg, which is the area under it. Negative on a compression, because then the surroundings did the work instead | joule | Boxes take J, kJ, cal or kWh: 600 J is the default, which is 0.6 kJ and 143.4 cal. |
| P | Pressure of the leg, held constant from one end to the other. The height of the rectangle | pascal | Boxes take Pa, kPa, bar, atm or MPa: 100 kPa is the default, 101325 Pa one standard atmosphere. |
| V1 | Starting volume, the left-hand edge of the rectangle | cubic metre; litres on this page | Boxes take L, m3, mL or cm3: 2 L is the default, which is 0.002 m3 and 2000 mL. |
| V2 | Final volume, the right-hand edge. Put it below the starting volume and every work figure changes sign | cubic metre; litres on this page | Boxes take L, m3, mL or cm3: 8 L is the default, which is 0.008 m3 and the same number of cm3 as mL. |
| gamma | Heat capacity ratio, the ratio of the two heat capacities. An input in every mode and never one of the four solve targets, and used by the adiabatic chip alone | dimensionless | A plain number: 1.4 for air and the common diatomic gases at room temperature, 1.66666667 monatomic, 1.33333333 non-linear polyatomic. |
| r | Volume ratio, V2/V1. The only thing the area fractions depend on for an isotherm |
dimensionless | Not a box: 4 at the defaults, 1.1 on the short-step preset, 10 on the extremes preset. |
| P2 | End pressure of the leg being compared. Unchanged along the isobar, P V1/V2 along the isotherm, P (V1/V2)^gamma along the adiabat |
pascal | In the working only: 100 kPa, 25.0000 kPa and 14.3587 kPa respectively at the defaults. |
The physics: why the same two volumes give three different areas
Start at 100 kPa and 2 L and expand to 8 L three different ways. Hold the pressure and the gas is still pushing at 100 kPa when it arrives, so the area is the full rectangle, 600.000 J.
Hold the temperature instead and the pressure sags to 25.0000 kPa on the way, leaving 277.259 J. Let no heat in at all and it sags faster still, to 14.3587 kPa, leaving 212.825 J.
So the end pressures descend in exactly the opposite order to the areas, and that ordering is the whole lesson: steeper path, less area. The isobar does 2.16404 times the isotherm and the isotherm 1.30275 times the adiabat, which is why a question that quotes a work without saying which path it followed has not been answered yet. The isothermal process lab is where the gentler of the two curves can be watched filling in on its own.
The area-fraction chip is a different function of your inputs, not a restatement of the first one. As a fraction of the rectangle, an isotherm keeps ln(r)/(r - 1), which depends on the volume ratio r and on nothing else at all: 46.2098 per cent at the default 4 to 1 and 95.3102 per cent at 1.1 to 1. An adiabat keeps a fraction that depends on both the ratio and the gas, 35.4709 per cent at the defaults and 30.1575 per cent for a monatomic gas, and as the step gets shorter every fraction climbs towards 100 per cent, because over a short enough interval every curve is flat.
Join four such legs into a loop and the enclosed area is the net work of an engine. A rectangle that runs out along 300 kPa and back along 100 kPa between 2 L and 8 L costs 1800 J going and gives back 600 J coming, so it nets 1200 J clockwise and the same magnitude the other way round as a heat pump. Round a closed loop the internal energy is unchanged, so the net heat equals the net work — but a diagram cannot tell you the heat taken in, which is why no efficiency is computed anywhere here and why the Carnot efficiency guide owns that ceiling instead.
Where the PV diagram calculator breaks down
The arithmetic here is exact to the last digit a double can hold. What fails is a rectangle being used for a journey that was not flat, a path being assumed where the gas never had one, an area being mistaken for a heat, and a single leg being read as a cycle.
- The headline assumes the pressure never moved
- That is the one condition under which the area is a rectangle, and real strokes rarely meet it: a piston driven against a fixed spring load holds its pressure, a sealed charge of gas does not. If the pressure drifted, the rectangle is an upper bound on an expansion and a lower one on a compression. The first two chips are printed next to it so that the size of the error is a number rather than a worry.
- Every path here is quasi-static, and a sudden one has no path at all
- A gas rushing into a vacuum is not in equilibrium on the way, so there is no curve to draw on the axes and no area to measure, even though the two end states are perfectly well defined. The work in that case is zero against nothing, and it is not the area under any of these four legs. If the process involves shock, turbulence or a free expansion, nothing on this page applies.
- The two curved chips assume an ideal gas, and the adiabatic one assumes reversibility
P V = constantandP V^gamma = constantare both ideal-gas relations, and the second holds for a reversible adiabatic process. A real gas close to its condensation point obeys neither, and an irreversible adiabatic squeeze does not follow the curve the chip integrates. Treat those two figures as the ideal bounds they are, and verify anything you mean to rely on against your own data.- Gamma is not a constant of the gas
- The three values this page names, 1.66666667, 1.4 and 1.33333333, come from counting the ways a molecule can store energy. Dry air measures close to 1.4 near room temperature and drifts by a few hundredths across several hundred degrees, which is the second decimal place and not the third. For a process spanning a wide temperature range, run the adiabatic comparison at both ends and treat the spread as the uncertainty.
- An area is a work, not a heat
- Nothing on this page computes a heat, an internal energy change or an entropy, and the first law is what connects them: for a closed cycle the net heat equals the net work, but for a single leg it does not. The first law of thermodynamics guide sets out that balance, and the first law of thermodynamics calculator closes it once you have one of these areas in hand.
- Nothing here is a cycle, and nothing here is an efficiency
- This page costs one leg, from one volume to another, and never a closed loop; a loop is the sum of its legs with their signs kept, which takes one run per leg. No efficiency and no coefficient of performance is computed, and that is deliberate rather than missing: a pressure-volume diagram fixes the net work but not the heat taken in, so an efficiency simply is not determined by it.
- The sign convention is the work done by the gas
- A compression therefore comes out negative here, and a source that writes the first law with the opposite sign will quote the same magnitude the other way up. The area-fraction chip also climbs above 100 per cent on a compression, which is correct rather than broken: pushing a gas back up a curve costs more than the straight line underneath it.
- A hyphen in the fourth chip is an answer, not a fault
- When the two volumes are equal the rectangle has no area, so the isothermal fraction would be zero divided by zero. The page prints a hyphen there instead of a NaN, and it declines the pressure mode outright, because a leg of no width does a stated work only if that work is zero and then every pressure satisfies it.
- The calculator measures nothing — you supply the numbers
- Three quantities and a heat capacity ratio go in, one relation is rearranged, and the answer describes the leg you described. The preset names are shorthand for the five figures behind them and are not claims about any particular engine or sample of gas. A gamma of 1 or below, a zero or negative pressure or volume, and equal volumes in the pressure mode are all refused rather than answered.
Where reading work off a PV diagram is actually used
- Costing a constant-pressure stroke
- This is the mode the page opens in, and it is the honest one for any piston working against a steady load: a bore and a stroke give the two volumes, the load gives the pressure, and the area is the work for that stroke. The top leg of a rectangular cycle preset is that calculation at three times the pressure, where the area triples exactly.
- Turning a measured indicator diagram back into a mean pressure
- Point Solve for at the pressure and the question inverts: an area planimetered off a chart and a swept volume give the constant pressure that would have done the same work. That is what a mean effective pressure is, and it is how two engines of different sizes are compared directly.
- Sizing the stroke a required work needs
- Point Solve for at the final volume and a work target comes back as a volume the gas has to reach. It is also the mode in which the chips earn their place, because they say what the same stroke would have delivered had the pressure been allowed to fall — and that gap is what a designer is choosing between.
- Deciding which path a real process actually followed
- Measure the work and the two volumes, then read the three figures together. An answer that lands on the rectangle says the pressure was held; one that lands near the isotherm says the gas had time to exchange heat; one below both says it did not. The Boyle’s law calculator is the tool for pinning down the end pressure of that middle case.
- Adding up a loop one leg at a time
- Run the calculator once per leg, keep the signs, and add. A rectangle out along 300 kPa and back along 100 kPa between 2 L and 8 L gives 1800 J and −600 J, so it nets 1200 J, and the two vertical legs contribute nothing at all. The return leg, run backwards preset is the second of those runs.
- Explaining why a vertical line does no work
- Load the no volume change at all preset and the headline itself goes to zero, which is a stronger statement than reading it off a chip. The gas may be heated hard, its pressure may climb steeply, and still no work is done, because the piston never moved. That is the leg students most often credit with work it cannot do.
- Showing that over a short step every path agrees
- Load the short step preset and the three areas come in at 20 J, 19.0620 J and 18.7032 J. Shrink the step further and they converge, which is both why differential calculus works at all and why a coarse grid on a measured diagram loses so little.
Where to go next
For what a PV diagram is, how the four legs sit on one pair of axes, how a closed loop becomes an engine and a set of worked problems, read the PV diagrams and thermodynamic cycles guide, which this tool is the arithmetic half of. The gas laws guide sets out the pressure, volume and temperature relations the paths obey, the first law of thermodynamics guide is where an area meets an energy balance, and the Carnot efficiency guide is the cycle that sets the ceiling. The laws of thermodynamics guide names all four in one place, and the kinetic theory of gases guide is where the pressure in these expressions comes from.
Four tools are worth a bookmark next to this one. The isothermal process calculator owns the logarithm the first chip quotes; the Boyle’s law calculator finds where a constant-temperature leg ends up; the ideal gas law calculator ties either end state back to an amount and a temperature; and the first law of thermodynamics calculator turns one of these areas into a heat. The Carnot efficiency calculator is the ceiling a cycle built from these legs cannot beat.
The isothermal process simulator, the Boyle’s law simulator, the first law simulator and the heat engine simulator are the neighbouring labs. The full physics lab library and calculator index are open too.
Frequently asked questions
What does the PV diagram calculator work out?
It solves W = P (V2 - V1), the area of a constant-pressure leg on a pressure-volume diagram, for any one of its four quantities: the work done by the gas, the pressure, the starting volume or the final volume. Beside the answer it prints the area under an isotherm joining the same two volumes, the area under an adiabat, the zero area of an isochore, and the isothermal area as a percentage of the rectangle.
Why is the work the area under the path?
Because the gas pushing a piston out through a small volume dV does P dV of work, and adding up all those slices from the starting volume to the final one is exactly what the area under the curve means. That is why the same two end states joined by different paths give different work: the paths enclose different areas.
Why does the same expansion give three different answers?
Because the three paths hold different things constant and so sit at different heights across the middle of the journey. Staying at one pressure keeps the whole rectangle, 600.000 J at the defaults; letting the pressure fall as the volume rises keeps 277.259 J along an isotherm; and letting it fall faster still, with no heat coming in, keeps 212.825 J along an adiabat.
What is the heat capacity ratio box for if the headline does not use it?
It sets the adiabatic chip and nothing else. The rectangle does not care what the gas is made of, and neither does the isotherm, but an adiabat does: a gas with more ways to store energy loses pressure more slowly and keeps more of the area. Change gamma from 1.4 to 1.66666667 and the adiabatic figure is the only number on the page that moves.
Why does the calculator refuse a heat capacity ratio of 1?
Because gamma minus one is the denominator of the adiabatic area, so a ratio of exactly 1 would divide by zero. It is unphysical as well: a value of 1 needs a molecule with infinitely many ways to store energy, and at that value an adiabat would simply be an isotherm. The guard refuses anything at or below 1 and says so rather than printing an infinity.
Why will it not give me a pressure when the two volumes are equal?
Because a leg of no width does the work you typed only if that work is zero, and if it is zero then every pressure satisfies it. The question has either no answer or every answer, so the page declines it instead of dividing by zero and publishing an infinity. The same state is a perfectly good answer in the other three modes: no volume change, no area, no work.
Can I use this calculator for a compression as well as an expansion?
Yes. Put the final volume below the starting one and the work comes out negative, which is the convention that the work is done by the gas: a negative figure means the surroundings did the work on it instead. All three path figures change sign together, and the area-fraction chip climbs above 100 per cent, because a compressed gas has to be pushed up a curve that rises above the straight return line.
Does this calculator work out the net work of a whole cycle?
Not in one pass. It costs one leg at a time, and a closed loop is the sum of its legs with their signs kept, so a four-leg rectangle takes four runs and the answers add. Round a closed cycle the change in internal energy is zero, so the net heat equals the net work as an identity, but a pressure-volume diagram alone does not determine the heat taken in, which is why nothing here computes an efficiency.
References & formula source
- The definition of a pressure-volume diagram, the statement that the work done is the area under the process curve, and the attribution of the diagram to James Watt and his employee John Southern in 1796 are taken from the Wikipedia article on the pressure-volume diagram, retrieved 2026-10-16.
- That a closed loop traversed clockwise on these axes represents a heat engine and delivers net work, that an anticlockwise loop represents a heat pump and absorbs it, and that the magnitude of the net work is the area enclosed by the loop, are taken from the Wikipedia article on the thermodynamic cycle, retrieved 2026-10-16. This page costs one leg at a time, so a cycle is the sum of its legs with their signs kept.
- The quasi-static condition, the sign convention in which expansion work is positive for the gas, and the result that a constant-volume process does no work are taken from the Wikipedia article on work in thermodynamics, retrieved 2026-10-16. The relation this page solves holds for a quasi-static leg: a sudden expansion has no well-defined path on the diagram and therefore no area to measure.
- The four closed forms used here are the standard ones for an ideal gas and are stated rather than derived: the isobaric area is P times the change in volume, the isochoric area is zero, the isothermal area is P1 V1 ln(V2/V1), and the adiabatic area is (P1 V1 - P2 V2) divided by gamma minus one with P2 = P1 (V1/V2)^gamma. The isothermal form is written in P and V rather than as n R T ln(V2/V1) because the two are equal only on an isotherm, where n R T equals P1 V1, and only the first can be read off a diagram that has no temperature axis.
- The values of the heat capacity ratio quoted on this page, 1.66666667, 1.4 and 1.33333333, are the standard model values for a monatomic, a diatomic and a non-linear polyatomic gas, stated here rather than derived. Gamma is not a constant of a gas, and a value carried hundreds of degrees away from where it was measured is wrong in the second decimal place, so type a measured ratio rather than a model one when you have it.
- Nothing on this page computes an efficiency, a coefficient of performance, an entropy, a heat, an internal energy, a slope dP/dV or an amount of gas, and no polytropic index other than gamma appears anywhere. Those belong to other pages, and this one links to them rather than repeating them. No real-gas correction is applied, so a figure near the point where a gas liquefies should be verified before use.
- Every figure quoted in the prose and tables above is either a string this calculator printed for the inputs named beside it, a constant stated on this page, or a ratio the cluster's independent reference script asserts: tests/ref.js, written before this page existed and sharing no code with it, runs 253 checks with 0 failures. Where a cell and the running widget ever part company, believe the widget.
- Further reading: Pressure–volume diagram — Wikipedia